🗂️ Anki Guide #1: Setting up Japanese flashcards and furigana
2023 November 04This is going to be a new series of Anki tutorials, because I am nothing if not a HUMONGOUS DORK when it comes to studying with Anki. Let's get started!
- Setting up your Anki deck
- Setting up your note type
- Making notes
- Reviewing your cards
- Editing your cards
- Keep making new notes
Setting up your Anki deck
So you've already downloaded and installed Anki, and your screen looks like this:
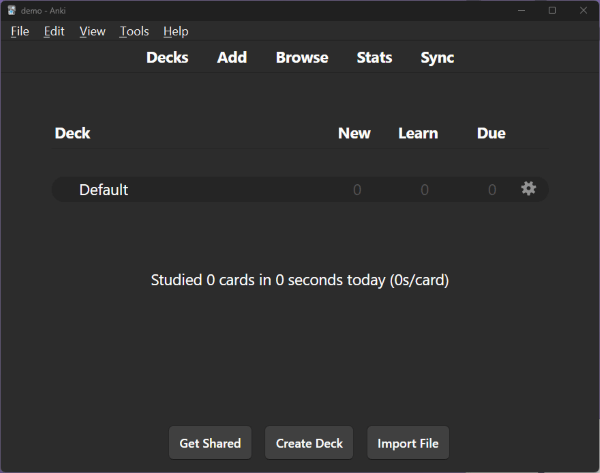
The first thing you are going to want to do is set up a dedicated Japanese deck. Click the gear icon next to your Default deck and rename it to Japanese.

Download the furigana plugin
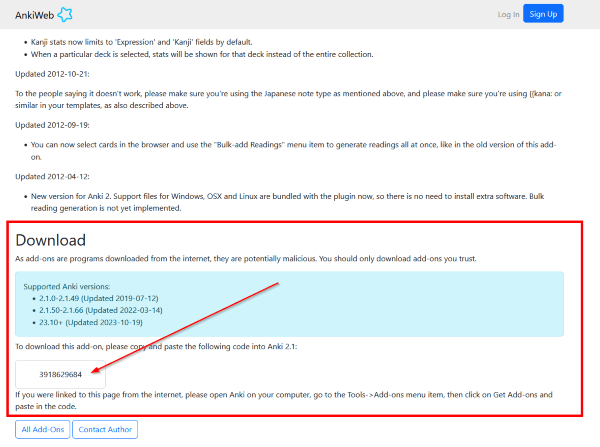
Next, let's get the Japanese plugin to get furigana on our cards. Go to this page and scroll down to the Download section. Copy the code in the box.
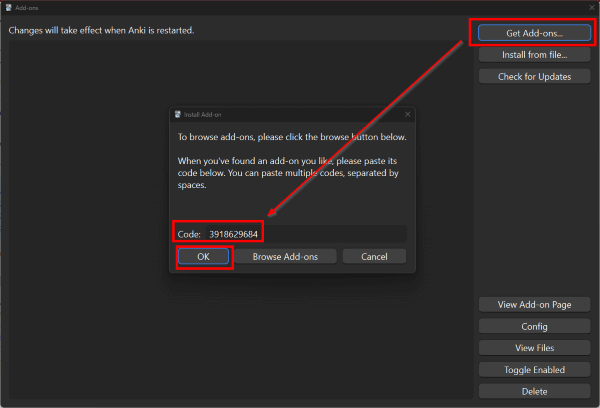
Then go back to your Anki program. Go to Tools > Add-ons and then click the Get Add-ons... button. Enter the code from the webpage. Click OK, wait for it to download and install, and then restart Anki.
Setting up your note type
Next, let's set up a general purpose vocabulary note. Before we go on, please note that Anki refers to notes as the thing where you enter in all of your data, and cards as the generated output that you review. You make notes and review cards. And we can create a template for your notes, which we will call a note type.
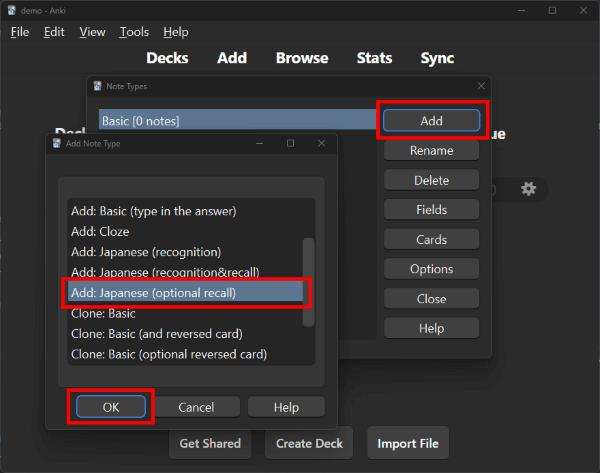
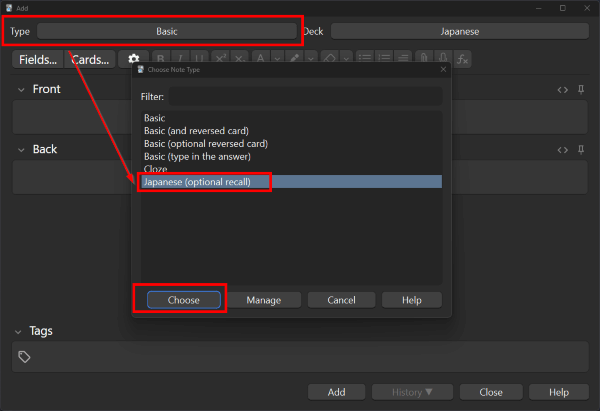
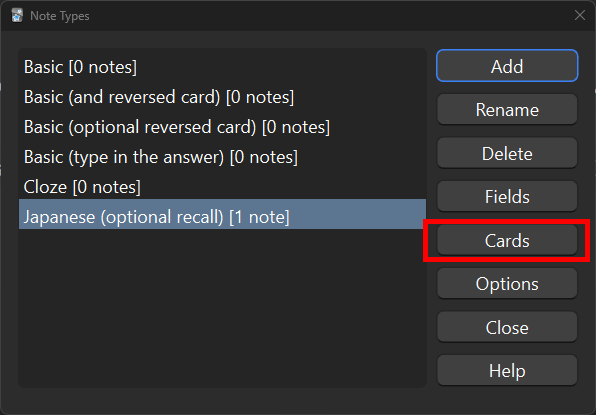
So let's set up your note. Go to Tools > Manage Note Types. These are the different note types which you can use to create notes. We want to add a new note type that utilizes the furigana from the Japanese add-on you installed earlier. Click on the Add button, highlight Add: Japanese (optional recall), and then click OK.
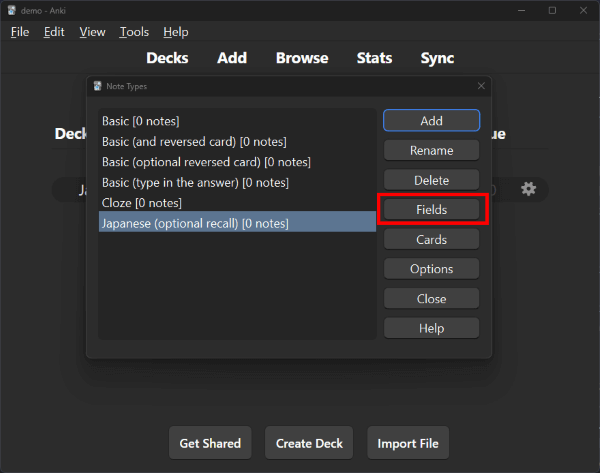
Now in your list of Note Types, you should see your new Japanese (optional recall) note type. Highlight that now, and then click the Fields button.
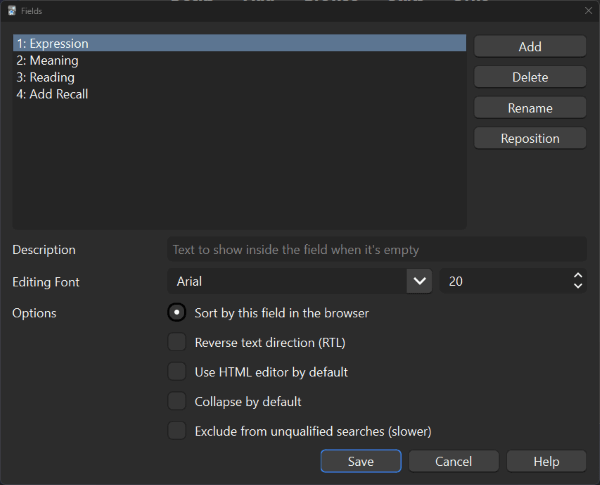
These are the fields that will show up whenever you create a new card. Expression is where you will write your Japanese (e.g. 猫), Meaning is where you put the meaning (cat), Reading will generate the furigana for any kanji in the Expression field (ねこ).
Adding and rearranging fields
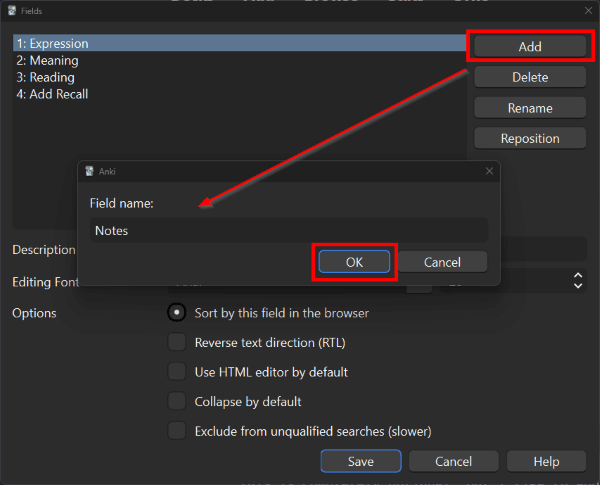
I personally like to add a bit more information to my cards. This is completely optional, but I like to add a Notes field for any notes I may have. To add a field, click the Add button. Enter Notes into the Field name, and then click OK.
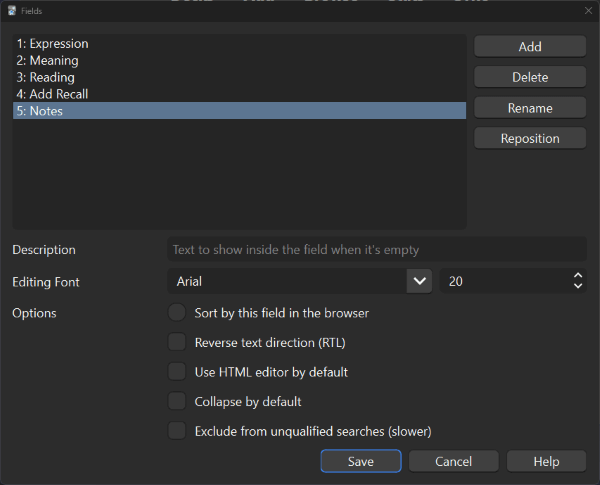
Now you have a Notes field!
But maybe you want to reorganize your fields. Click the Reposition button on any field, and then enter which position from the top you want to see that field. For example, I want to have Expression, Reading, Meaning, Notes, and Add Recall in that order. So hit Reposition on Meaning and move that to 3 and click OK...
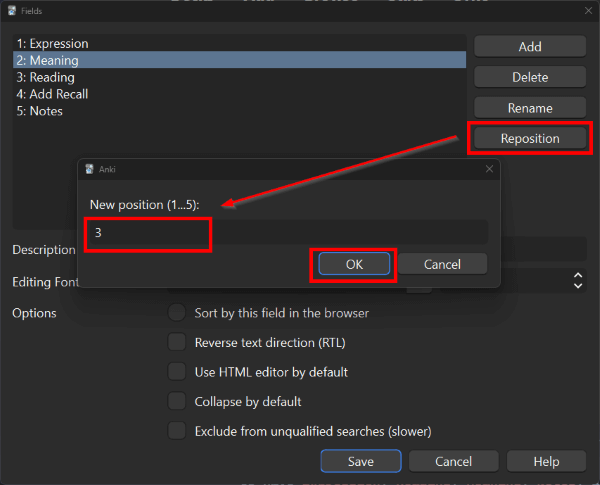
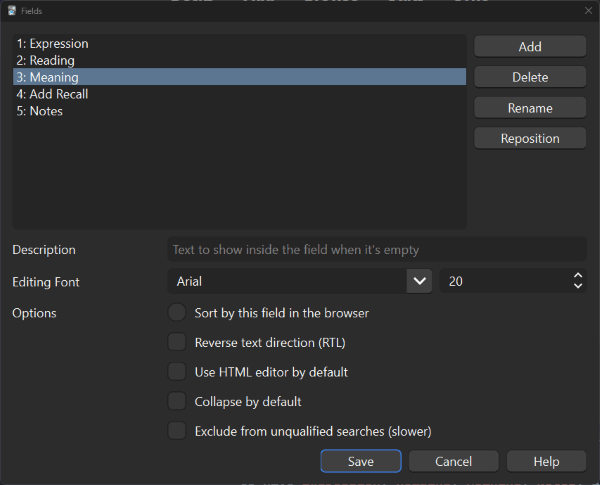
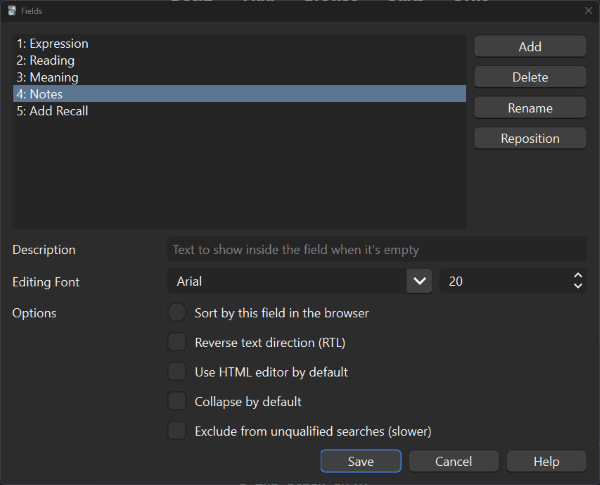
Ta-da! And do the same to move Notes to fourth position...

Making notes
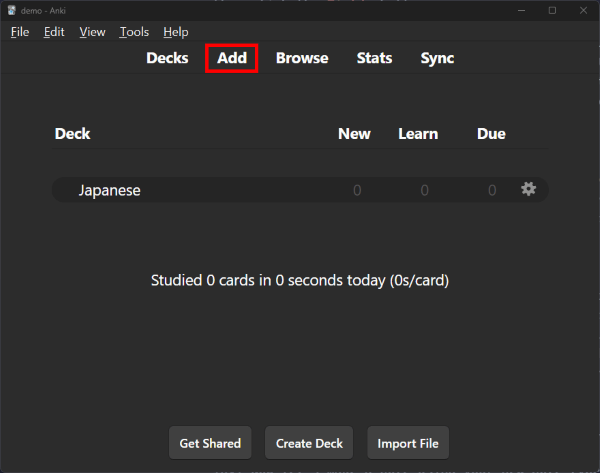
Yay! You are done with setting up your note type! Now let's get to the main event: making notes! Click Save, then Close the Note Types Window to get back to your main Anki screen. Then click Add at the top...
In this new window, click the box next to Type and select your new Japanese (optional recall) note type, and then hit the Choose button...
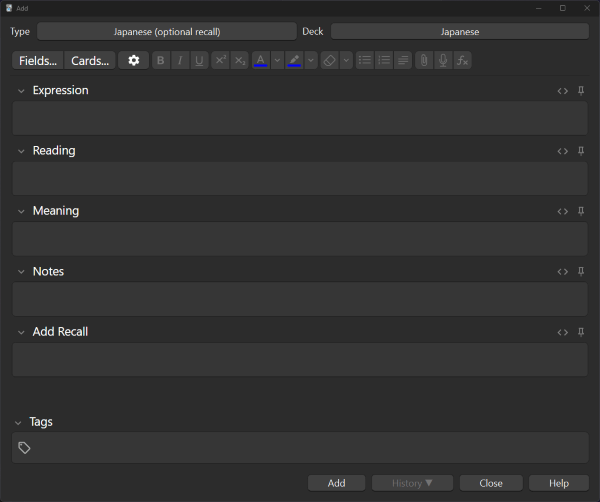
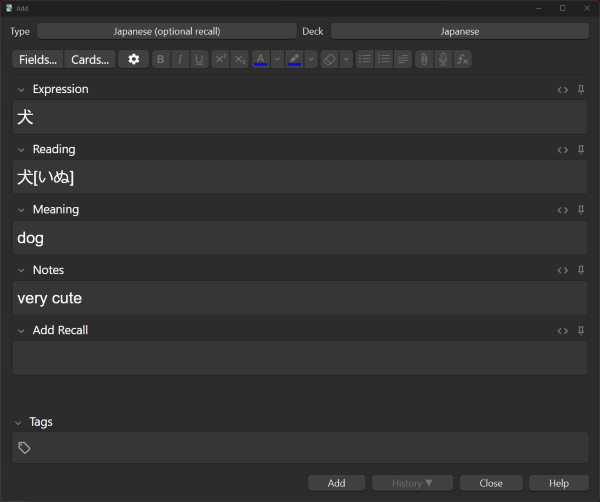
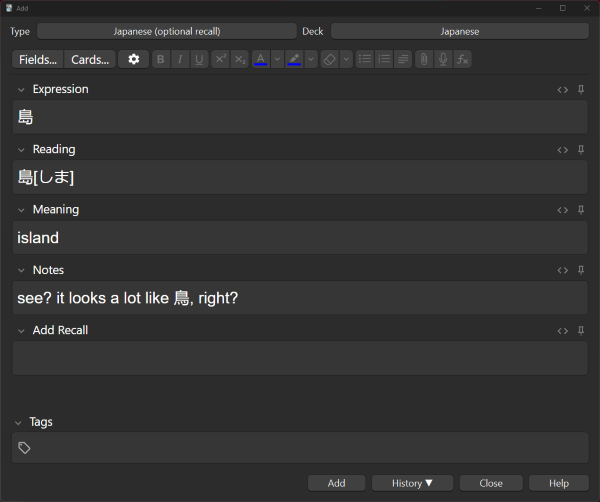
Your screen should now look like this! Now to enter in your data. Note that thanks to the plugin you installed earlier, you do not need to manually enter in the Reading field, as it should be automatically populated once you fill out the Expression field.
Then enter in the Meaning, any Notes you may want, and if you're feeling really spicy, you can start adding in tags. But for now, all you really need is Expression, Reading (which should be handled for you), and Meaning.
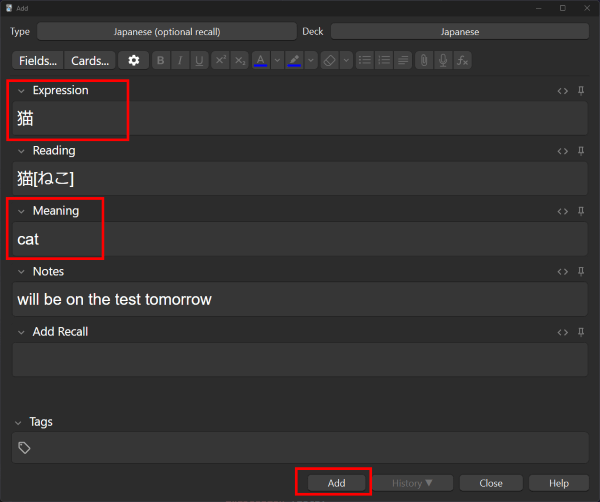
Hit the Add button at the bottom. Ta-da! You've made your first note!
Reviewing your cards
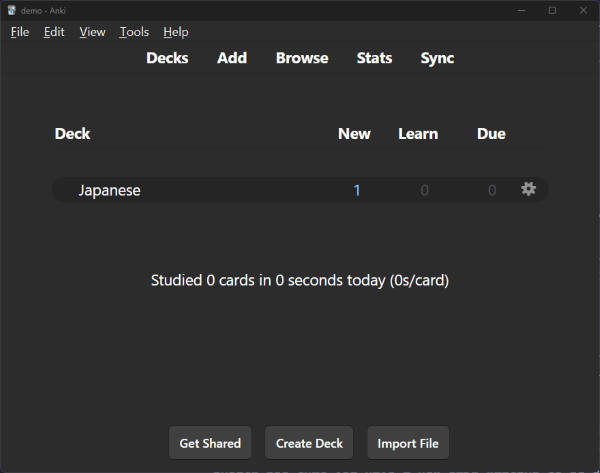
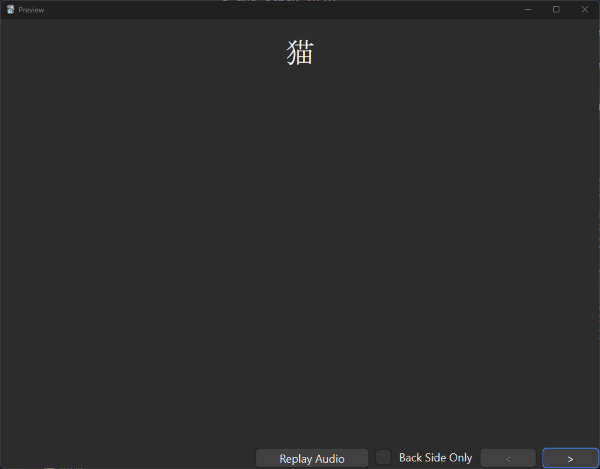
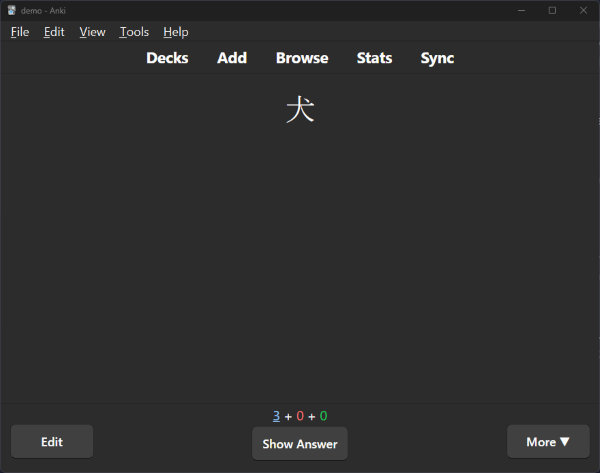
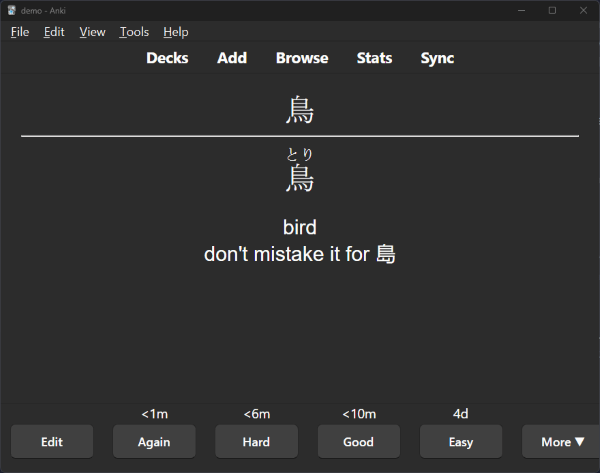
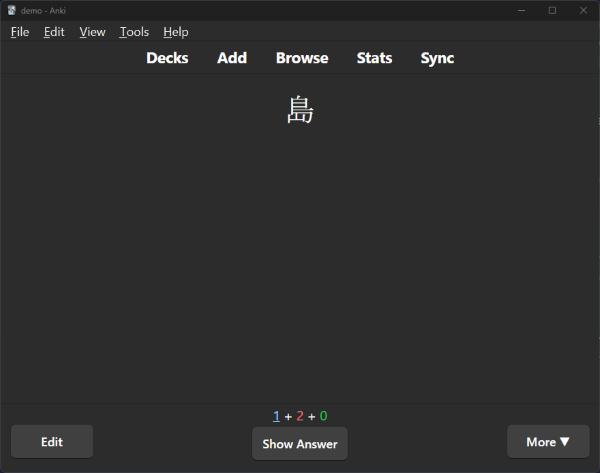
When you go back to your main Anki screen, you should see that you have a new card waiting to be studied! When you click your Japanese deck and then the blue Study Now button, you should see your new card. This is the front:
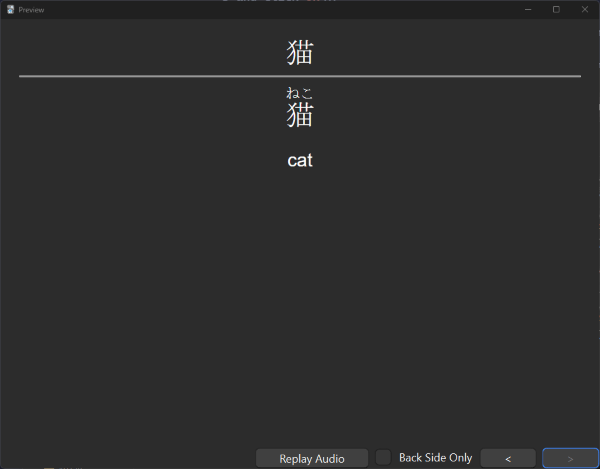
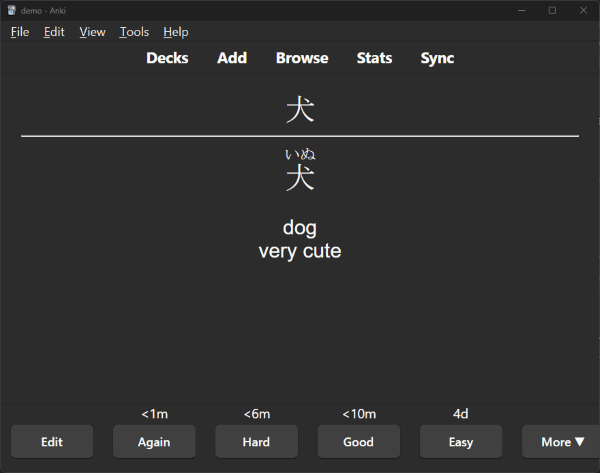
And then the back:
So that's how you input notes to your deck to study!
Editing your cards
But you'll notice that this card doesn't have the Notes field that we created earlier. So go back to the main Anki screen, and go to Tools > Manage Note Types again. Highlight your Japanese (optional recall) note type again, and this time click the Cards button.
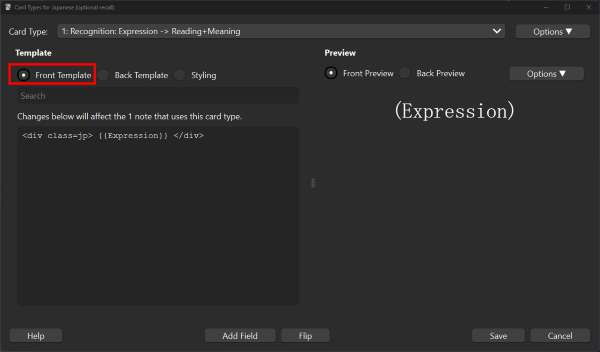
This brings up the card editing screen. Think of this as the template that Anki will use to serve up the data you entered into your note. This is the front view of your card, which you'll remember showed you the Expression (猫)...
And this is the back, which has the Reading (ねこ) and Meaning (cat):

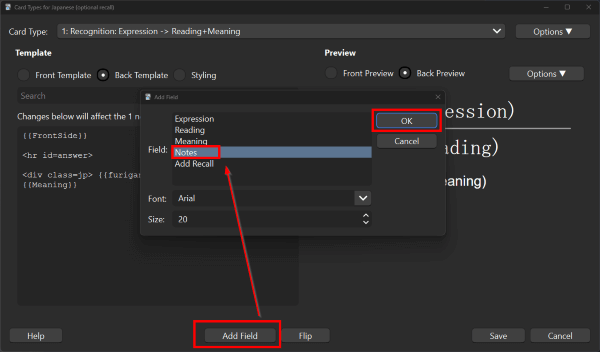
Let's say you want to add your Notes field under the Meaning. Click Add field, highlight Notes, and then OK. Now you should have something like this:
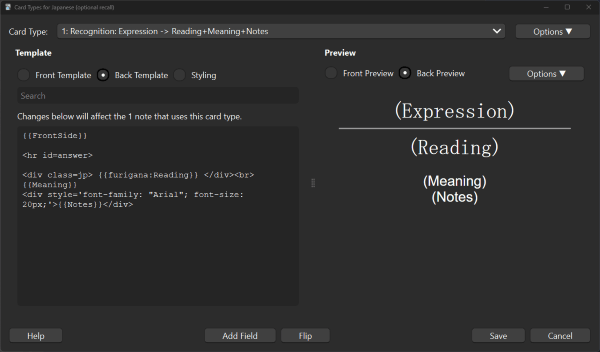
If you know HTML and CSS styling, you can customize your card further. But for now, click Save, and then Close the Note Types window.
Keep making new notes
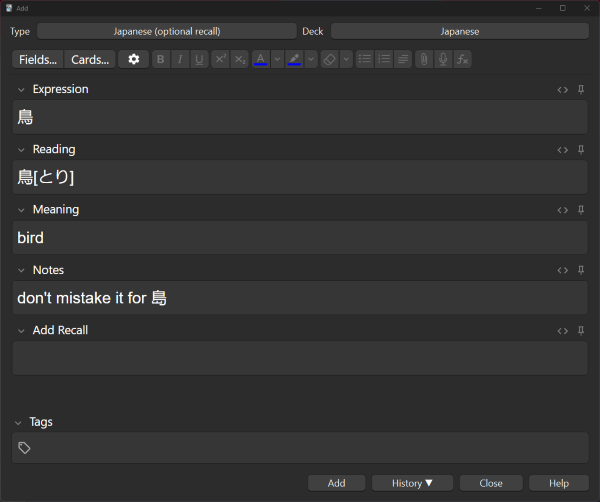
Once you've set up your note type and formatted your cards, you don't need to do that anymore. Now you can just focus on adding new notes to your deck! Click Add and let's make another note!
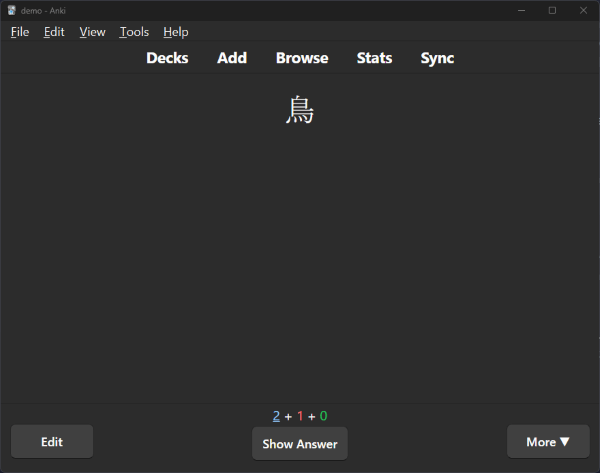
And when you study your Japanese deck, those cards will look like:
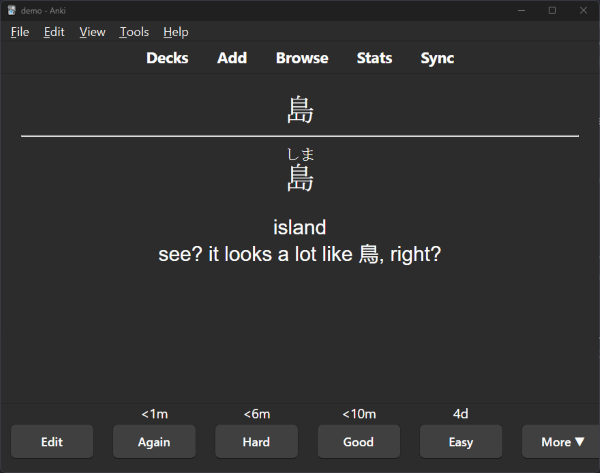
And there you go! Now you can make notes for your vocab and quiz yourself in Japanese!